Installing a mini-split system can be a great way to enhance the comfort of your home without the need for extensive ductwork. Whether you’re looking to cool a single room or multiple zones, a mini-split system offers flexibility and efficiency. In this guide, we’ll walk you through the steps to install a mini-split system.
Please Note: While this guide provides a general overview, it’s always best to consult with a professional for a precise and safe installation. For expert help in Vacaville, check out our AC installation services.
Choosing the Right Mini-Split System
Before diving into the installation process, selecting the right mini-split system is crucial. Here are the key factors to consider:
1. Size of the Area:
Determine the square footage of the area you want to cool or heat. Mini-split systems are available in various capacities measured in BTUs (British Thermal Units). A unit that’s too small won’t effectively regulate the temperature, while an oversized unit may cycle on and off too frequently, reducing efficiency.
2. Number of Indoor Units:
Consider how many indoor units you’ll need. Mini-split systems can be single-zone or multi-zone. A single-zone system is perfect for cooling or heating one room, while a multi-zone system can control the temperature in multiple rooms or zones independently.
3. System Efficiency:
Look at the system’s SEER (Seasonal Energy Efficiency Ratio) rating. Higher SEER ratings indicate more energy-efficient systems, which can save you money on your energy bills in the long run.
4. Features and Functions:
Modern mini-split systems come with various features, such as programmable timers, remote controls, and smart home compatibility. Choose a system with features that match your lifestyle and preferences.
5. Brand and Warranty:
Select a reputable brand known for reliability and durability. Check the warranty terms to ensure you have adequate coverage for your investment.
By carefully considering these factors, you can choose the right mini-split system that meets your needs and ensures optimal performance. For personalized advice and professional installation, reach out to All Weather Heating & Air Conditioning. We’re here to help you find the perfect solution for your home.
Gather Your Tools and Materials
Before you start the installation process, make sure you have all the necessary tools and materials. Having everything ready will make the process smoother and more efficient.
Tools You’ll Need:
- Drill and drill bits
- Level
- Screwdrivers
- Wrench set
- Hole saw
- Pipe cutter
- Vacuum pump
- Torque wrench
Materials You’ll Need:
- Mounting brackets
- Screws and anchors
- Refrigerant line set
- Electrical wiring
- Insulation tape
- Condensate drain line
- Weatherproofing materials (such as caulk or sealant)
Safety Equipment:
- Safety glasses
- Gloves
- Dust mask
Having these tools and materials on hand will help ensure a smooth installation process. Remember, safety first! Always wear appropriate safety gear when drilling, cutting, or handling electrical components.
By being prepared with the right tools and materials, you’ll be well on your way to successfully installing your mini-split system. If you need professional assistance, our team at All Weather Heating & Air Conditioning is here to help. Visit our contact page to get in touch.
Installing the Indoor Unit
Step 1: Choose a Location
Select a location on the wall where the indoor unit will be installed. Ensure it’s away from direct sunlight, heat sources, and any obstacles that could block airflow. Make sure there’s enough clearance around the unit for air to circulate freely. The recommended height for installation is usually around 7-8 feet from the floor.
Step 2: Mount the Bracket
- Mark the Position:
- Use the provided mounting bracket to mark the positions for the holes on the wall. Ensure the bracket is level to avoid any misalignment.
- Drill the Holes:
- Drill holes for the mounting bracket, making sure they are the appropriate size for the anchors and screws.
- Secure the Bracket:
- Insert the anchors into the holes and secure the bracket to the wall using screws. Double-check that the bracket is level and firmly attached.
Step 3: Drill a Hole for the Refrigerant Lines
- Determine the Exit Point:
- Choose a spot for the hole that will allow the refrigerant lines, drain pipe, and electrical cables to pass through the wall. Typically, this hole is about 3 inches in diameter.
- Drill the Hole:
- Use a hole saw to drill the hole through the wall. Ensure the hole has a slight downward slope to the outside to allow for proper drainage.
Step 4: Connect the Refrigerant Lines
- Prepare the Lines:
- Carefully follow the manufacturer’s instructions to connect the refrigerant lines to the indoor unit. The lines usually come pre-insulated, but you may need to wrap additional insulation tape around the connections to prevent condensation.
- Run the Lines:
- Pass the refrigerant lines, drain pipe, and electrical cables through the hole in the wall.
Step 5: Mount the Indoor Unit
- Hang the Unit:
- Lift the indoor unit and hook it onto the mounting bracket. Make sure it sits securely and all connections are properly aligned.
- Check the Connections:
- Ensure all connections (refrigerant lines, drain pipe, and electrical cables) are secure and properly insulated.
By following these steps, you’ll have the indoor unit of your mini-split system securely mounted and ready for operation. For any difficulties or if you prefer professional installation, our team at All Weather Heating & Air Conditioning is here to help. Explore our AC repair services if you encounter any issues.
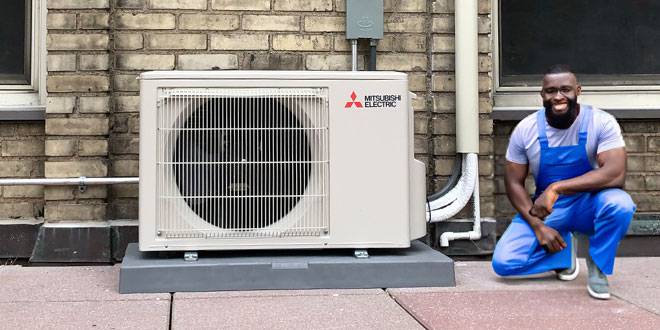
Installing the Outdoor Unit
Step 1: Choose a Location
Select a location for the outdoor unit that is stable and well-ventilated. It should be placed on a flat, stable surface away from debris and obstructions. Ensure there is adequate clearance around the unit for airflow and maintenance access.
Step 2: Install the Mounting Pad
- Prepare the Surface:
- Clear the area where the outdoor unit will be placed. Remove any debris and level the ground if necessary.
- Position the Pad:
- Place a pre-fabricated mounting pad or pour a concrete slab to serve as a stable base for the unit. Ensure the pad is level to prevent vibration and noise.
Step 3: Connect the Refrigerant Lines
- Run the Lines:
- Carefully run the refrigerant lines from the indoor unit to the outdoor unit. Make sure the lines are properly insulated to maintain efficiency.
- Secure the Connections:
- Use a torque wrench to secure the refrigerant line connections to the outdoor unit. Follow the manufacturer’s specifications for the correct torque values to ensure leak-free connections.
Step 4: Connect the Electrical Wiring
- Shut Off Power:
- Before making any electrical connections, ensure the power is turned off at the main circuit breaker.
- Run the Wiring:
- Follow the manufacturer’s instructions to connect the electrical wiring between the indoor and outdoor units. Use the appropriate gauge wire as specified in the installation manual.
- Secure the Wiring:
- Make sure all electrical connections are secure and properly insulated. Use weatherproofing materials to protect the connections from moisture.
Step 5: Install the Condensate Drain Line
- Position the Drain Line:
- Attach the condensate drain line to the designated outlet on the outdoor unit. Ensure the drain line slopes downward to allow for proper drainage.
- Secure the Drain Line:
- Use brackets or clips to secure the drain line and prevent it from shifting or becoming damaged.
By following these steps, your outdoor unit will be securely installed and connected. If you need assistance or prefer professional installation, our team at All Weather Heating & Air Conditioning is here to help. For ongoing maintenance and service, check out our AC maintenance services.
Finalizing the Installation
With both the indoor and outdoor units securely installed, the final steps will ensure your mini-split system operates efficiently and effectively.
Step 1: Vacuum the System
- Attach the Vacuum Pump:
- Connect a vacuum pump to the service port of the outdoor unit. This process removes any air and moisture from the refrigerant lines, which is crucial for the system’s performance.
- Create a Vacuum:
- Turn on the vacuum pump and let it run until it reaches the desired vacuum level, typically around 500 microns. This process can take up to an hour.
- Close the Service Valves:
- Once the vacuum level is achieved, close the service valves on the outdoor unit to seal the system.
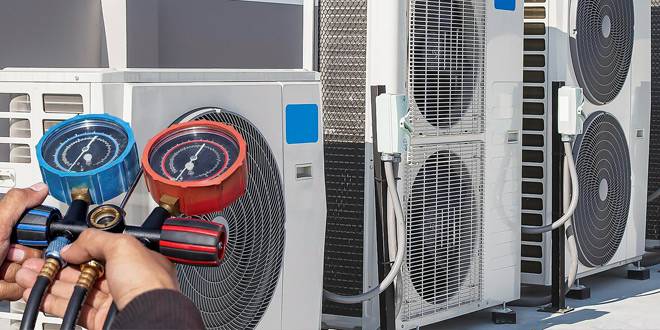
Step 2: Release Refrigerant
- Open the Valves:
- Slowly open the refrigerant valves on the outdoor unit to release the refrigerant into the lines. This step must be done carefully to avoid any leaks.
- Check for Leaks:
- Use a leak detector or soapy water to check all connections for leaks. If bubbles form, tighten the connections and check again.
Step 3: Test the System
- Restore Power:
- Turn on the power at the main circuit breaker and the disconnect switch near the outdoor unit.
- Power On the System:
- Use the remote control or thermostat to turn on the system. Set it to the desired temperature and mode (cooling or heating).
- Observe Operation:
- Allow the system to run for a while and check that both the indoor and outdoor units are functioning properly. Listen for any unusual noises and ensure the airflow is steady and cool or warm, depending on the mode.
Step 4: Final Touches
- Secure and Insulate Lines:
- Ensure all refrigerant lines, electrical wiring, and drain pipes are secured and properly insulated. Use weatherproofing materials to seal any holes or gaps where the lines enter the house.
- Cleanup:
- Clean up the installation area, removing any debris or tools. Make sure the indoor unit’s filters are clean and properly installed.
Step 5: Schedule Regular Maintenance
Regular maintenance is key to keeping your mini-split system running efficiently. Consider scheduling annual maintenance with All Weather Heating & Air Conditioning to keep your system in top shape. Our AC maintenance services include thorough inspections, cleaning, and performance checks.
By following these steps, your mini-split system should now be fully operational, providing comfortable and efficient climate control for your home. For professional assistance or any questions, contact us at All Weather Heating & Air Conditioning. We’re here to ensure your home stays comfortable year-round.
Schedule Regular Maintenance
Regular maintenance is essential to keep your mini-split system running smoothly and efficiently. Proper maintenance not only extends the lifespan of your system but also ensures optimal performance and energy efficiency. Here’s what you need to know about maintaining your mini-split system:
1. Clean the Filters:
- Frequency: Every 2-4 weeks.
- How to Clean: Remove the filters from the indoor unit and wash them with mild soap and water. Allow them to dry completely before reinserting them. Clean filters improve airflow and maintain indoor air quality.
2. Inspect the Outdoor Unit:
- Frequency: Monthly.
- What to Check: Ensure the outdoor unit is free from debris such as leaves, dirt, and grass clippings. Clear any obstructions around the unit to maintain proper airflow.
3. Check the Refrigerant Lines:
- Frequency: Annually.
- What to Inspect: Look for any signs of wear or damage on the refrigerant lines. Ensure the insulation is intact and replace it if necessary.
4. Clean the Coils:
- Frequency: Annually.
- How to Clean: Gently clean the coils of both the indoor and outdoor units using a soft brush or a vacuum with a brush attachment. Dirty coils reduce the system’s efficiency and can lead to higher energy bills.
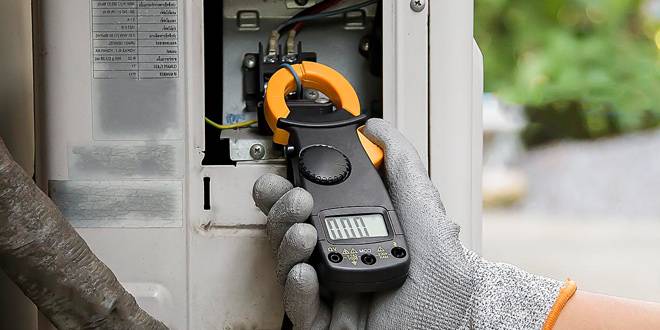
5. Inspect Electrical Connections:
- Frequency: Annually.
- What to Inspect: Check all electrical connections for any signs of wear or corrosion. Tighten any loose connections to ensure the system operates safely and reliably.
6. Test the System:
- Frequency: Annually.
- What to Test: Run the system through its various modes (cooling, heating, fan) to ensure each one is working correctly. Listen for any unusual noises and ensure the system responds to thermostat settings.
7. Professional Maintenance:
- Frequency: Annually.
- Why It’s Important: Schedule an annual maintenance visit with a professional HVAC technician. They can perform a thorough inspection, cleaning, and tune-up of your mini-split system, identifying any potential issues before they become major problems.
Our team at All Weather Heating & Air Conditioning offers comprehensive AC maintenance services in Vacaville. We ensure your system stays in top condition, providing reliable comfort all year round. Regular maintenance can help prevent unexpected breakdowns and costly repairs.
8. Monitor Performance:
- Ongoing: Keep an eye on your system’s performance. If you notice any changes in efficiency, strange noises, or insufficient cooling or heating, it may be time to call a professional for an inspection.
By following these maintenance tips, you can ensure your mini-split system operates efficiently and effectively for years to come. For expert maintenance and repair services, don’t hesitate to contact us at All Weather Heating & Air Conditioning. We’re dedicated to keeping your home comfortable and your HVAC system running smoothly.
Conclusion
Installing a mini-split system can significantly enhance your home’s comfort, providing efficient and flexible climate control. By carefully choosing the right system, preparing with the necessary tools and materials, and following the detailed steps for installation, you can ensure a successful setup. Remember, professional assistance is always available for those who prefer expert handling or encounter any difficulties during the process.
Regular maintenance is crucial for the longevity and efficiency of your mini-split system. By keeping up with routine cleaning and inspections, and scheduling professional maintenance annually, you can enjoy reliable performance and avoid costly repairs.
For any installation, repair, or maintenance needs in Vacaville, trust All Weather Heating & Air Conditioning. Our experienced team is dedicated to providing top-notch service and ensuring your home remains comfortable year-round. Contact us today to learn more about our services and how we can assist you.